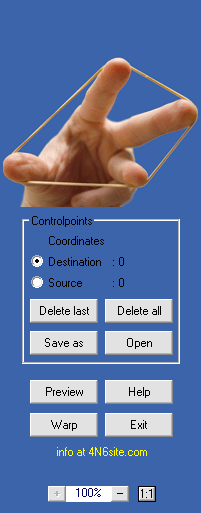
Warping plug-in
4N6site.com
How to use it

Once you copied the plug-in to your host's plug-in folder you will find it in the filter menu (Photoshop), under "Forensic Filters".
After opening your RGB image and choosing "Image Warping" from the filter menu you will see your image in the preview. You can drag the image with the left mousebutton down on the image, and you can adjust the magnification with the buttons at the bottom of the button panel. By right-clicking in the image you can mark your control points in the source and destination image. The subsequent marks will be in red, green, blue, and yellow.
If you want to map your source image onto another destination image you can mark your 4 controlpoints in the destination image first. You can then exit the plug-in to switch to the source image. The restart the plug-in to mark your 4 controlpoints (in the same order) in the source image. Your source image is then ready to be warped! Press the "Preview" button to see the result without leaving the plug-in, or press "Warp" to warp the original image and exit the plug-in. The try-out version only shows the warped image in the preview.
Your current controlpoints are always stored, and you can save them in a file of your choice (a textfile with ".wrp" as its extension). Of course you can open those files as well, so your warping is documented completely. "Delete last" works like a "Backspace" on your controlpoints, while "Delete all" deletes all controlpoints in either your source or destination image.
Hints
• The parts of the warped image for which no information is available will be black if your original image was a "Background layer" (as usual). If you want these parts to be transparent simple make your original image a "layer".
• If you want your destination controlpoints to form a precise square or rectangle (or any other particular location), you can also edit these controlpoints in the ".wrp"-file, and load the resulting file. The coordinates of the controlpoints are stored as integers in this textfile (first the destination controlpoints, then the source control points, each set preceded by the number of used controlpoints).
• You can get the original carpark image used in the example here (courtesy Peter Kovesi).