Fourier transform plug-in
4N6site.com
How to use the Fourier transform plug-in
Once you copied the plug-in to your host's plug-in folder you will find it in the Filter menu (Photoshop), under "Forensic Filters".
Your source image should be converted to RGB mode, because eventhough the Fourier transform only works on the intensity in the image, you will need the RGB channels to store the Fourier transformed image. The power spectrum will be in the Red channel, and the phase information in the Green channel.
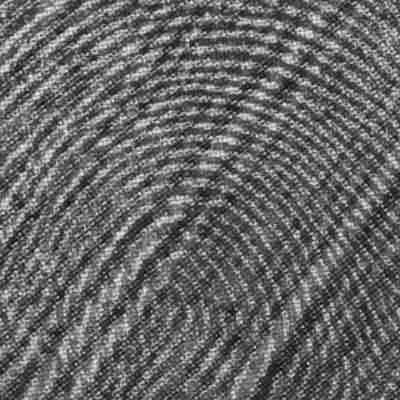
The images below show a fingerprint on a printed document, and its Fourier transform (the power spectrum in the Red channel). Download this testimage in full quality, if you want to try the following for yourself.

 After Fourier transforming the image we choose the Red channel to edit the power spectrum alone.
 We can then remove the diagonal pattern in the source image by painting away the lower frequencies associated with it (near the center of the image). You can paint over with black, or - as in this example - use the clone brush.
 N.B.: Don't forget to select all channels before you transform back (by clicking on RGB).
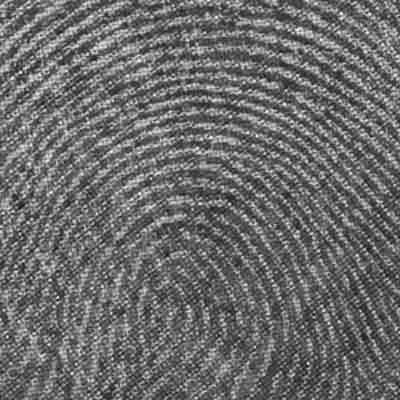 In the resulting image after applying the inverse FFT, the diagonal pattern has been suppressed:
Click on the image to see the original and observe the improvement.
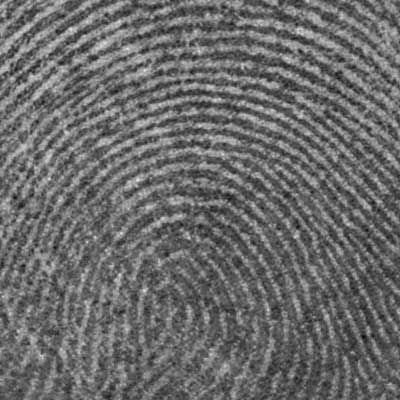 Using the same procedure can also remove the screening pattern in the Fourier transformed image. This time we remove the repeated patterns surrounding the central pattern (using for example the healing brush of Photoshop).
Click on the image to see the original and observe the improvement.
Download the Fourier Transform plug-in so you can use it with your host application.
Understanding the Fourier transform
The Fourier transform decomposes a waveform or function into sinusoids of different frequency which sum to the original waveform. It identifies or distinguishes the different frequency sinusoids and their respective amplitudes.
The Fourier transform of an image is itself an image where each "pixel" corresponds to the intensity of a frequency.
Thus, locations in the Fourier transform image identify periodicity and orientation from any or all parts of the original image. The Fourier transform can help us to detect periodic structures that need to be enhanced, and possibly those we want to get rid of.
This is an example of a 2D sinusoid sheet, with brightness converted to height.
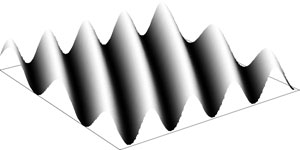
The original image is given by the sum of all sinusoid sheets. Each of these sheets is given by the following properties:
- frequency: distance to center
- amplitude: brightness in the red channel
- phase: brightness in the green channel
- orientation: direction of the radius from the center
We now look at some special cases with the original image given by only one sinusoid sheet. The original image is on the left, the Fourier transformed image is on the right (red channel only, phase information is omitted).
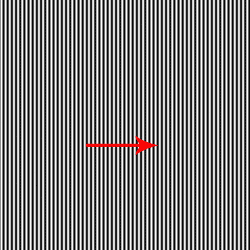
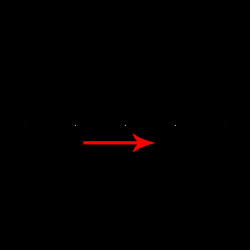
Note how the orientation and frequency are reflected in the Fourier domain. The dot in the center is related to the average image intensity (frequency zero).
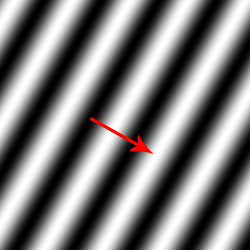
These images show how difference in orientation and frequency is shown in the Fourier domain. The pointsymmetry of the Fourier transformed image is due to the fact that the original image has no imaginary component.
You can find some more examples in this tutorial on Fourier Space Image Processing (note that the amplitude is inverted there).
These slides on Images in the Frequency Domain ![]() are from a very informative computer vision course by Gareth Loy. There is also a version with one slide per page
are from a very informative computer vision course by Gareth Loy. There is also a version with one slide per page ![]() (7.1 MB).
(7.1 MB).